What Are The Detailed Steps For The Mywifiext.net New Netgear Setup?
Netgear wifi range extender aims to improve the wireless internet connectivity at your home. The initial setup is to establish a connection between your wifi range extender and your home network. With this, the signal is strengthened and the network is spread to the network dead zones as well. If you have got a new Netgear wifi extender then you have to perform the new extender setup by visiting the mywifiext.net setup. Let’s dive into the article for Netgear wifi extender setup using mywifiext.net setup

Stepwise Instructions For Netgear Wifi Extender Setup Via mywifiext.net setup:
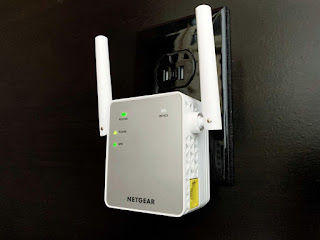
Step 1: The first and foremost step is to plug your wifi extender into an AC wall socket. And, enable the power supply by switching it on. Press the power button on your extender and wait for the power light to be lit.
Step 2: The next step involves associating your computer or mobile phone to the extended network. To do that, search for the SSID NETGEAR_EXT in the enlisted available networks. To enter the password, try ‘password’ or leave it blank as there is no password.
Step 3: On your computer or phone, launch your web browser and open the mywifiext.net or 192.168.1.250 page.
Step 4: This will launch the New Extender Setup web page.
Step 5: To proceed with the setup, click on the ‘New Extender setup’ tab choose ‘agree’ or ‘yes’ on the terms and conditions page.
Step 6: Next, choose the admin details that are utilized to have access to your Netgear’s wireless settings. Then hit the next tab to proceed further.
Step 7: If asked, to use the Netgear genie, tap on yes to select the settings.
Step 8:Now, your wireless extender will start searching for the available wifi networks in your range.
Step 9: From the radio options, 2.4 GHz and 5GHz select the appropriate wifi network. After that click on the next tab to move ahead.
Step 10: After that enter your current wireless network’s passkey to proceed.
Step 11: Now you have to choose SSIDs or network names for your Netgear extender. It will by default choose the _2GEXT and _5GEXT for 2.4 GHz and 5 GHz bands respectively.
Step 12: Hit on the Apply tab to save the settings you have made.
Step 13: The Netgear wifi extender will now display the SSID differently for each band.
Step 14: Now on your computer and smartphone go to the wifi settings menu and click on your range extender’s SSID to connect to it.
Step 15: Go back to the browser and choose the continue option now.
And Voila!
With this, your Netgear wifi extender setup is finished and you can experience high-speed network connection in all areas of your home. Mywifiext.net setup helps you to set up your Netgear wifi range extender to your home wireless network conveniently and hassle-free. The guidelines in the above blog help you to do the new extender setup in easy steps. After the setup is complete you can also access the configuration settings of your Netgear wifi extender. You can manage all the settings related to the firmware, software, network status, etc. Isn’t that just amazing? We know right. Enjoy the extended network!

Comments
Post a Comment