Methods for Netgear WiFi Extender N300 Setup
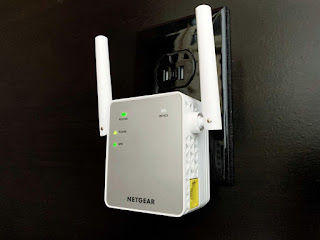
Are you looking for such a device that can extend the internet connectivity in your home or office? Want to access the internet connection in dead zones? Well, now it is possible with Netgear WiFi extender n300 setup. It is one of the best networking devices which helps in connecting both wired and wireless smart devices connected with the internet connection. This extender device comes with two antennas providing the ultimate coverage area. Here, in this article, you will know how to perform Netgear WiFi extender n300 setup by accessing the mywifiext.net login webpage.

Steps for Netgear WiFi Extender N300 Setup Using WPS Method
Netgear WiFi Extender n300 comes with WPS capabilities that enable the user to set up their extender device by using the WPS method without accessing Netgear Genie wizard. Following are the steps for Netgear n300 setup using the WPS method:
Step 1: Firstly, place your router and extender in the same room and also closer to each other.
Step 2: Ensure that the router which you want to extend should have an active internet connection and WPS is enabled on it.
Step 3: After that, plug in the Netgear WiFi extender into the power socket and wait for some time until the router is boot up successfully and the LED power light turns to solid green.
Step 4: Next, search for the Netgear n300 WPS button. Once you find it press and hold the WPS button for some time until the LED power light starts blinking.
Step 5: Tap on the WPS button of the router. Wait for some time until the WPS LED light turns to solid green on both extender and router.
Step 6: Place your Netgear n300 extender at the place of your choice where you want to extend the network coverage.
Step 7: Thereafter, you will get a network in your wireless with routername_ext.
Step 8: Connect your device with the Netgear WiFi extender n300.
Congratulations, you have successfully completed the Netgear WiFi extender n300 setup.
Instructions for Netgear WiFi Extender n300 Setup Using Mywifiext Setup
An alternative way for Netgear WiFi Extender n300 Setup to boost the WiFi connection is by using the mywifiext.net login webpage. Go through the below step by step instructions for Netgear extender n300 setup through Genie setup wizard:
Step 1: Firstly, place both extender and router in the same room nearer to each other.
Step 2: After that, connect the Netgear n300 extender into the reliable electrical socket. Turn on your extender. The whole process takes 30 seconds to boot up the router device. You have to wait for some time until the power LED light turns solid green.
Step 3: Thereafter, connect your device to the Netgear extender n300 network.
Step 4: Launch any web browser of your preference from your device.
Step 5: Visit mywifiext.net login and set up your Netgear WiFi Extender n300. After this, the Netgear extender setup wizard will open. Then, click on the new extender setup tab.
Step 6: In the next step, the Netgear Genie wizard will open. Now, create a new account. Follow on-screen instructions and change the username and password of the extender n300.
Step 7: Now, connect your device to the extended network by using the password set up by you.
Congratulations, you have successfully completed Netgear WiFi extender n300 setup by using the WPS method and by accessing the mywifiext.net login webpage. Still, if you are facing any issue after following the above steps for setting up your extender then call us at our toll-free number to talk with our experts for the best solution.


Comments
Post a Comment