Quick Guide To Set The Netgear N300 Extender For Home Network
When it comes to increasing your wifi network’s range, then Netgear range extenders are the best in the market. You enjoy an extended network speed with the Netgear N300 extender. To start using the Netgear N300 wifi range extender for your home network you need to set it up. Netgear wifi extender setup is done manually via mywifiext.net setup. When you connect to the Netgear N300 wifi range extender you will be automatically directed to the mywifiext.net setup. Read out the following blog to perform the Netgear Wifi extender N300 setup manually.

Detailed And Quick Guide To Set Up Netgear N300 Wifi Extender:
Here are quite some steps to do the Netgear wifi extender setup but they are quite easy hassle-free to perform. Follow the steps mentioned below to do the Netgear N300 wifi extender setup:
First of all, unbox the Netgear N300 wifi extender and get rid of all the packaging material.
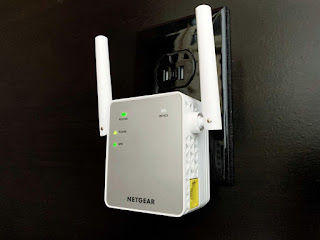
Look out for all the specifications, LED lights, and buttons on the extender.
To start with the installation setup, plug the wifi extender in the AC wall socket.
The power LED indicator will turn orange, and after approximately 30 seconds it will turn solid green.
Then, go to the taskbar of your system and click on the wifi icon to connect to the extender.
Here, you will observe the Netgear extender SSID i.e. Netgear_EXT. Click on it to establish the connection with it.
Once you click on the SSID, you will be automatically directed to the mywifiext.net setup page.
Here on this page, you will see the ‘New Extender Setup’ tab. Tap on this tab to initiate the setup process.
Then, create a new account by entering the required information in their respective fields.
Enter your Email Id, password, and answer the three security questions to create the Netgear account.
Then, shoot the Next tab to continue.
After that, a web page will appear showing two options, one is, Wifi Range Extender and the other is, Access point.
Choose the method in which you want to set up your Netgear N300 range extender.
In your case, click on the Wifi Range Extender Setup option and click on the Next tab to continue.
Then, a list of available wifi networks will come on your screen. Choose your home wifi network that you want to connect to. Then hit Next to continue.
Enter the password to your home wifi network carefully and click on next to proceed.
If the password you entered is correct you will be able to connect the wifi extender to the wifi network.
Then, you can configure your wifi extender’s settings.
Now, you can make alterations to the username and password of the extender. While entering the password the prompt will ask you if you want the password to be the same as your home network’s password or you want to change it. Choose your preferred option.
Click on next to apply these settings and proceed.
The next web page will show you the details of your Netgear N300 wifi extender.
Then, navigate back to the desktop and open the taskbar to connect to the extended network.
Click on your range extender’s name and voila! You will be connected to the extended network.
Enjoy The extended Network!
That’s it! You are connected to the Netgear N300 wifi extender extended network. Wasn’t the Netgear wifi extender setup an easy job? With the help of mywifiext.net setup, the setup process becomes easy. While performing the Netgear wifi extender N300 setup make sure that the network connection is proper. Also, note down the extender’s login information so that you don’t have a problem connecting other devices to it. Enjoy the extended network and improved signal strength.


Comments
Post a Comment